As the archive pen was tossed into the circular file, I began to think of another issue that needs to be taken care of. The deck was unclamped from the table, and examined. The ripples are almost gone.
The deck was sanded, leveling out the planking and removing some of the heavy pen marks.
The spaces in between the holds need to be done with a sanding stick. The stern galley floor is very flimsy………the thought of setting the deck back in, is yet another threat that it might get broken. I cut some diagonal pieces and glued them in place, to guard against this from happening.

While this was drying, the spar deck was sanded again, and the holds were touched up……getting rid of that white crap. When everything was ready, the decks were brought out to the garage. The spar deck was first.


Then, the gun deck was next in line.

The stern galley floor was masked up to prevent lacquer getting on it. I want to do a special planking job.


It was a waiting game at this point. When they were dry enough, they were brought back to the table. The gun deck was installed back into the hull.
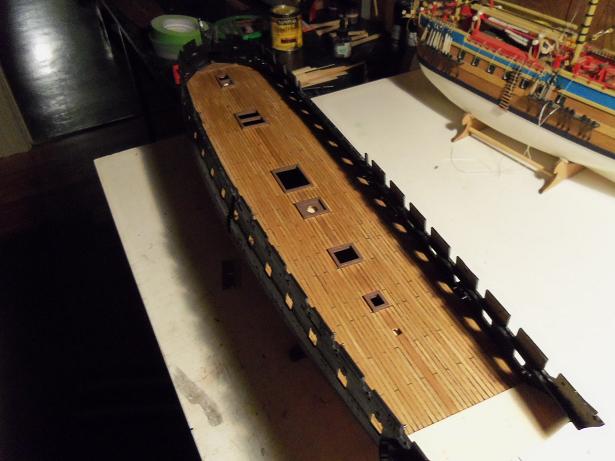
A small piece of edge planking did come off in the process……..I can put it back on when the deck comes back out. I hate to do it, but I have to paint the inside walls and I want to do the galley floor {it will be easier to trim this way}.

Then the spar deck was set in place, and the whole concept was revealed to me. I’ve been dying to see this 🙂


I tried to find the right angle to get pictures of the gun deck. Not being able to do this….I settled for the most obvious.

The galley floor sits quite level, and the bracings I added to it don’t interfere with the installation. I may have to sand this area when it comes time to install the stern fascia……but I’ll worry about that then {I may elect to do it in wood}. I’m very happy with the results.


AHOY!!!
I did the count…….there were 15 rows on the starboard side, and only 12 rows on the port side. I need to make up 3 rows. I completed one row……and started two more……..

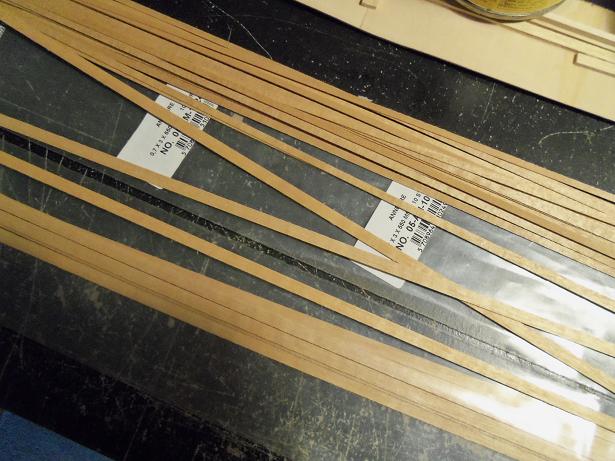
They went very quick……both sides are equal now. These plank strips are 550 mm long {about 21 5/8 inches}……..I bought six packages. That’s about 60 strips. I was able to do the poop deck, the spar deck, and just over three quarters of the gun deck…….that’s quite a bit!

I ended up with this much left…….most of it is waste.

The archive pen….it’s getting worse…….even the tip is beginning to show major wear! I loaded it up some more, and began with the cut stuff. The reason why I emphasize this, is because most of the cut strips are not exactly 3 mm. The way that I cut it caused it to taper at one end. I have to pick out the better strips and use what I can of them. I finished off the port side.
Keeping the edge shimmed and clamped, I turned it around and finished off the starboard side.

When both sides were done, I left it shimmed and clamped to the table. I did this during my work week, so I left it until Monday evening, to free it from the clamps.

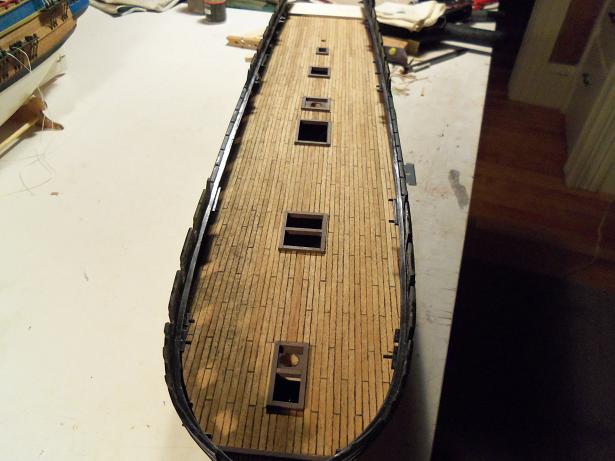
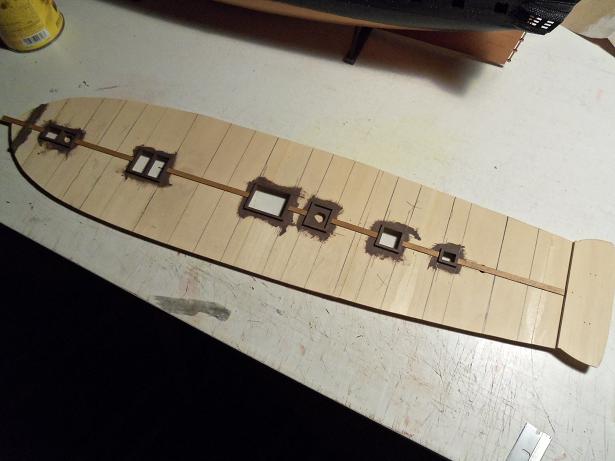
Then, I trimmed off all the excess planking, to reveal the true shape of the deck.

The edges still need to be sanded and smoothed out. Now, it will be sanded, to remove the high spots and the excess pen marks. The archive pen died on the very last row……I had to resort to magic marker to finish it. The pen is now dry……..never to draw another line…….ever again! R.I.P….archive pen 😦
AHOY!!!
With about 25 planks left, they were divided and used, first with fanning out the port side.

The planks were laid evenly all the way to the stern, so I could keep better track of the count.

I began to get nervous, when I saw how many planks I had left.

I had better switch over to the starboard side.

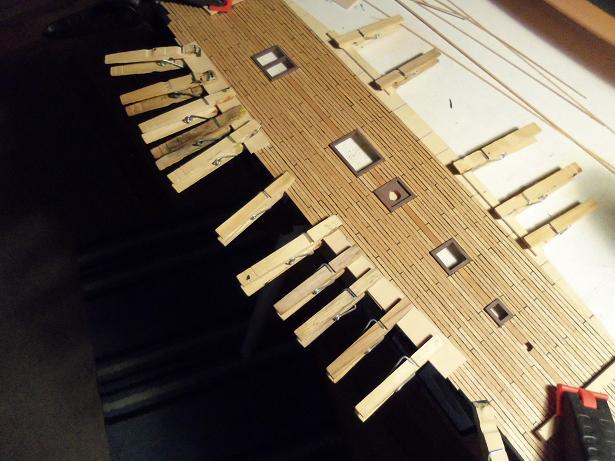
I noticed that the sides had developed a couple of ripples. I clamped them using pieces of flat stock and clothes pins. These were kept on the deck all though the planking process. I figured that the relative humidity and the drying planking, would aide in ironing them out. The deck was also clamped to the table to help correct the curling issue, that has plagued this particular deck. The spar deck grain pattern is different than the gun deck, which has been a valuable lesson to learn. In the future, I will base the grain pattern fore and aft, rather than port to starboard. The planking progressed.


I went a couple of rows further with the starboard side, than the port side, which left a much smaller area to fill at the bulwarks. I will need to pace the planking, so I can do the same to the port side. The planking you see is all I have left of the 3 mm……..I’m cutting it very close.


It only equates to a mere couple of rows….but I need to remember that these are the largest decks I have ever done this to……..and with scale planking to boot!

I will keep the rippled areas shimmed and re clamp the deck, once I turn it around again. Once this is done, I can begin using the cut planking. I almost forgot to mention………my archive pen is in bad shape. I have a bottle of India Ink……..I have already added some to it once…..trying to keep the pen alive. I already made one goof……leaving the cap loose on it, and caused it to dry out on me! Luckily, I was able to revive it. I might not be as lucky next time. I will add some more ink, when I’m done with this session.
AHOY!!!
Again, I let these logs pile up on me……….now I have to play ‘catch up’, and bring you all up to snuff with what I’ve been up to. It makes no never mind if I decided to go ahead with planking the gun deck, before or after I cut down the strip stock….the fact is…….I did it 🙂 I will plank the gun deck with the 3 mm planking I have on hand, and then finish up with the planking I cut down.
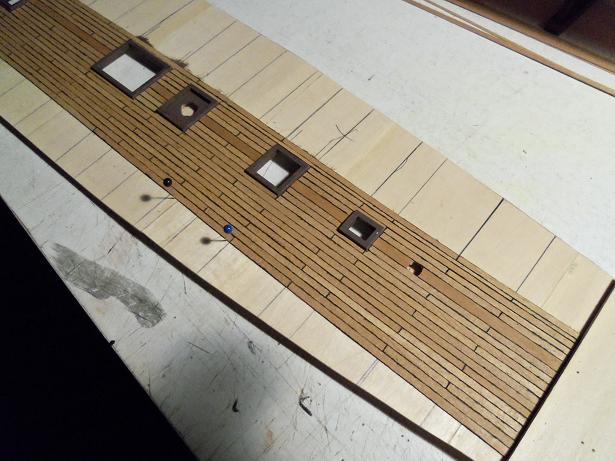
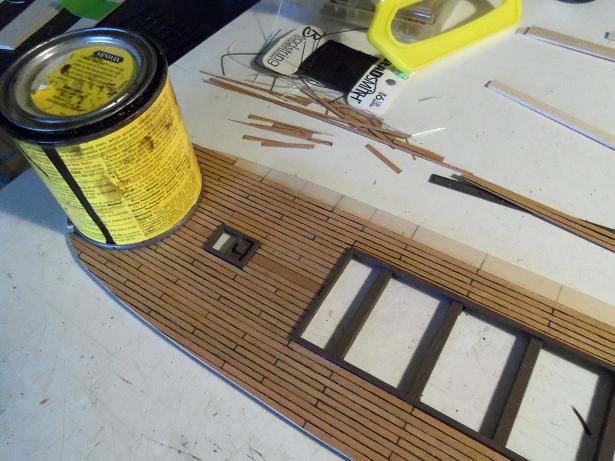
I started with the center line of the deck. I did the king plank, the same as on the spar deck. The butt joint lines were drawn as well.

With this complete, the center areas of the deck will be filled out, boxing in all of the holds. There was some creative trimming, to get the planks to fit.
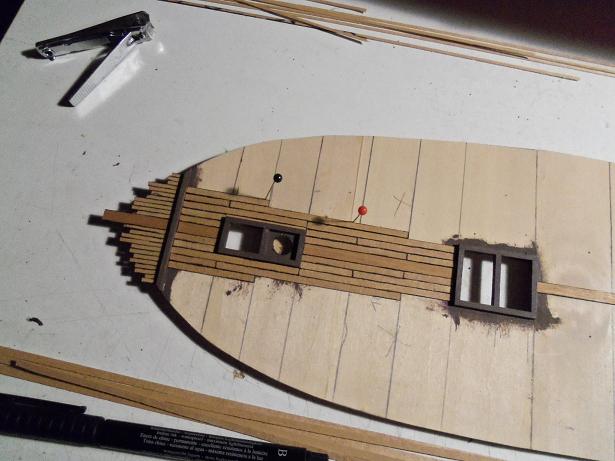
The tip of the bow section was done with some of the cut down stuff. This area will never be seen anyway………if it can be seen, I’ll be surprised. I tried to stay equal with the rows of planking on both sides, so that when I make the change, it won’t be as noticeable.

With the center area complete, I’ll now fan the two sides out…….again, even with the rows. It will be interesting where it will end off……I hope it’s reasonably close to the bulwarks. Towards the aft end of the planking {starboard side}, I did have to use a piece of the cut down planking. There was a very narrow gap created by boxing in one of the holds. I just picked out a piece that would fit……..and there you go!
AHOY!!!
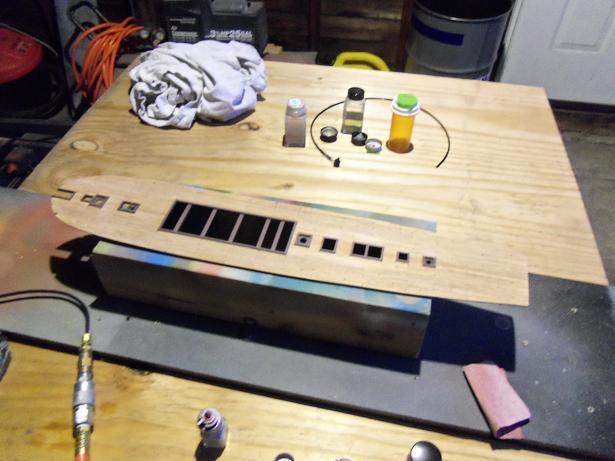
I have never been a big fan of the rattle can. While it’s convenient to have enough paint to do any job, the lack of control in the spray, and the amount of paint laid down, can be a big problem. I went ahead and decanted the rest of the first can, and half of the second can I bought.
To look at the lacquer collected, it’s hard to tell, due to the fact that it’s still inundated with the propellant. I use a collection bottle to decant the paint and transfer it to smaller bottles. For a collection bottle, it needs to be a larger bottle, so there is adequate room for gasses to separate from the paint, as it decants. I decanted roughly 1 1/2 ounces of lacquer.

When I picked up the collection bottle, it was cold to the touch. This is when I discovered the culprit……..moisture. There was moisture collecting on the outside of the bottle…..a sort of a fogging, that left finger prints, after I transferred the lacquer. It all boiled down to the fact, that when the paint {lacquer}, was sprayed from the can, the small orifice that is the sprayer, causes the paint to expel at a much faster rate. This in turn, drops the temperature of the paint and in most cases, drops it lower that the ambient temperature, causing moisture and condensation to develop. Airbrushes work at a much lower PSI that the rattle can, so the opportunity for this to happen is much lower. Not to say it won’t happen with an airbrush, but the ability to adjust the air pressure, makes it a much better way to paint.
I will have to sand the deck again, but this time, I will use the airbrush, and I should have no more problems with it. I also faced another problem……I was running out of the 3 mm thin planking. I counted and found that I only have 25 strips left. I thought I was going to have to pause the build, so I could order more…….but I had a thought.
I have 13 strips of the 5 mm Annegre in the same hue, and I wondered about how they could be cut down to width. I only have my scroll saw…….to do it, I would have to make a jig. I started with a piece of wood, the same size as the scroll saw table. Then I cut a guide slot in the center of it.

Then I cemented guide bars along the sides for the strips to pass through.

the piece you see in the center will be used as a pressure plate, to hold the strips in place, as they pass into the blade. It was clamped in place on the table and set up. When the moment of truth came, I found that the pressure stick wasn’t going to work, so I ended up pressing a finger in back of the blade, and my index finger just before the blade. Not to worry….no fingers were harmed with this process 🙂
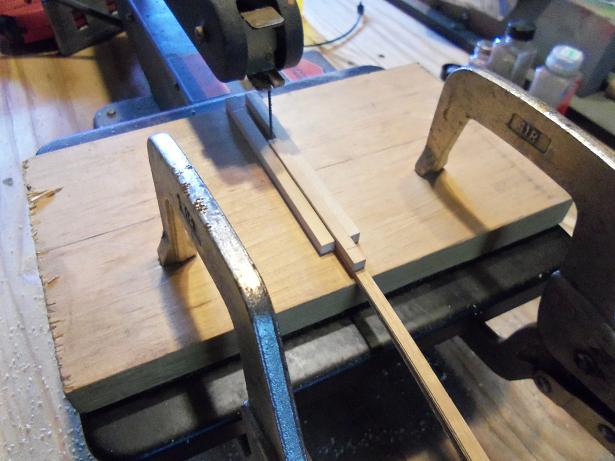
I did this very slowly. It was working quite well, but I found that the further along I got, the strips hit the back arm. I switched from the pushing, to a pulling motion, and continued by passing them off to the side of the back arm. In the future, now that I know I can do this, I’ll set it up with the blade adjusted sideways………this can be done with this saw. I ended up with the fruits of my labor.

Now I can continue with the gun deck! I will use up the rest of the regular stock, staying as equal from the center as I can…….then I’ll continue with this new stock that I have created. It’s a crude way to do this, but with a bit more thought, I might be able to create attachments for the saw.
AHOY!!!
The Wharf come to life early. As they awoke, some had noticed that during the night, there was a dusting of spring snow, that had fallen. They knew that morning mess would have to be quick……..the deck will need to be cleared off, before they could continue their work. The tracks in the snow began to multiply, as more of the carpenters made their way to the dry dock.


Yea……this is pretty extreme! The second coat of lacquer turned white.
Lacquer is a difficult paint to work with. There are two main factors that it needs to have to be used successfully. It need to be at least above 60 degrees, and the ambient temperature cannot harbor any moisture. I had done the first coat in the late afternoon. I did the Poop deck in the house.
It is a small deck……I didn’t think it would cause the uproar that it did. But, with all the complaints I got, I moved the operation into the hallway. It’s a closed in area……I could spray the deck, close the door, and everyone would be happy. The first coat didn’t turn white on me, but when I did the second coat, it was getting dark and turning cooler outside. It rained a bit some time after I had sprayed the second coat…….I guess now I know just how air tight the hallway is. The only thing to do now, is sand the deck and remove the white stuff. Getting another coat on it is out of the question at this time………rain had moved in, and looks like it will be staying a while.
To wait on refinishing this deck is bad……..it will have too much time to cure, thus becoming permanent. I guess I’ll have to be sure and do a good sanding…….the paint parts will need to be redone.
Today is Saturday……I got home from work, settled in and up to speed with home life……and then ran out to the garage with the deck. I gave it a quick spray and let it sit for a very short time, before bringing it back into the house. The threat of rain is still out there. I was sad to see that a little white still came back……..or did not disappear with the respray. I will have to do some more sanding, before another attempt can be done. I really hate to think of making another deck 😦


AHOY!!!
Once back on the spar deck, I tried to hurry a little………I usually don’t complain, but standing there with my head bent forward like that, was putting a serious crimp on my posture. My left hip was starting to feel like someone was inserting pins in it…….and my neck was bugg’in me.

Not much left! I’m gaining on it!!
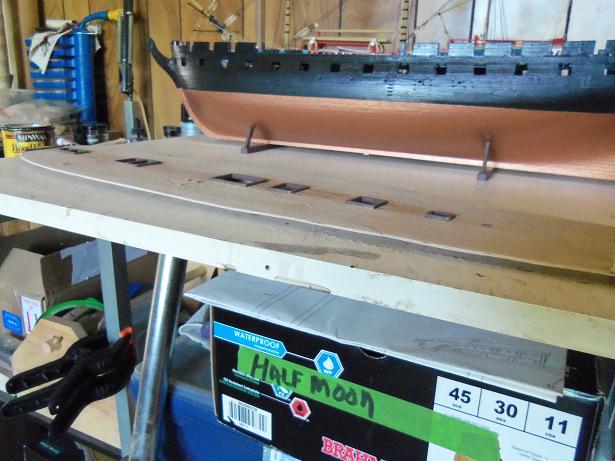
You’ll notice that I put weights on both ends of the deck……..this was to keep it from curling, as the glue dried. Finally……I was finished!


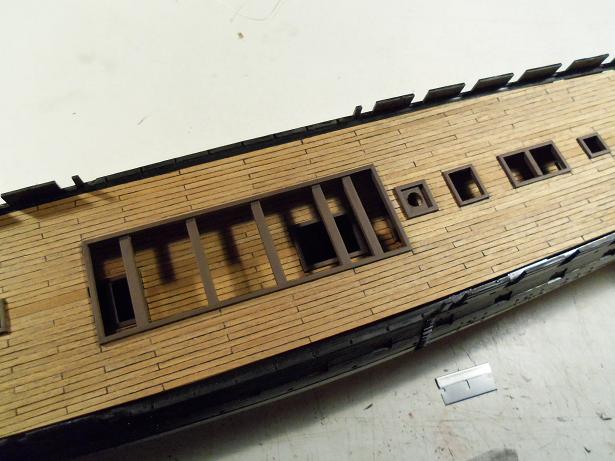
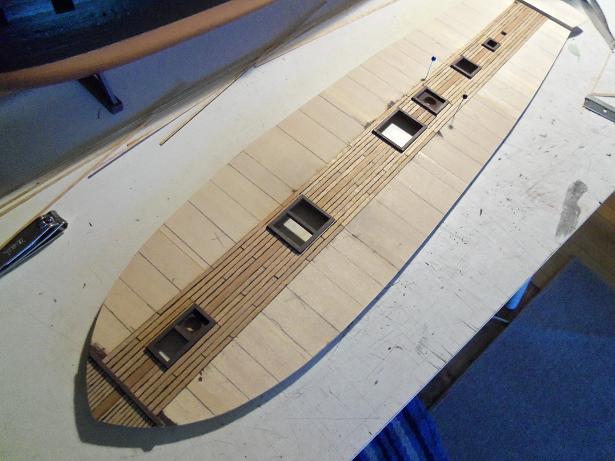
As you can see, I have already trimmed the starboard side. Here, you can see how visible the mid ship plank lines are, in relation to the rest of the deck. I like how the king plank is highlighted as well. Another example of how I have been keeping weights on the decks…..is the gun deck. I really don’t need that deck giving me any more grief!

That is about all the 3 mm planking I have left……somewhere around 25 strips……….not enough to do the gun deck. Bother!!! Perhaps I can figure out how to cut down some of the 5 mm planking……not having the tools to do this, is such a pain! The port side is trimmed and the deck has been sanded. I also touched up the paint work to get rid of all the nicks.


I will give this the same amount of coats, as I did the poop deck. The poop deck got two coats……..and boy!…….let me tell you……this is as flat as you can get! Really dead-pan!
AHOY!!!
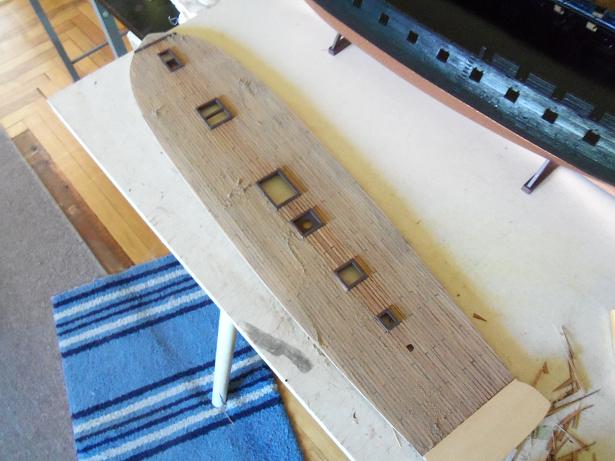
The poop deck was traced and cut out. On most ships, deck of this nature are done using full length planking. The plastic deck shows me otherwise, so this is what I will do. Measuring the spacing between the butt joints, I marked them on the platform. I also decided to give it a king plank of it’s own.

While I was planking the poop deck, I made more progress on the spar deck. The starboard side is fully planked.

Between the two……..I had finished the poop deck as well.

Then the deck was trimmed and sanded smooth.

I used the flat lacquer that I had bought in the rattle cans. I was going to decant them, but I said the heck with it. they’ll do, just the way they are.

This is only one coat……..I gave it a second coat a bit later, after I was sure it had dried. It was time to finish off the spar deck.
AHOY!!!
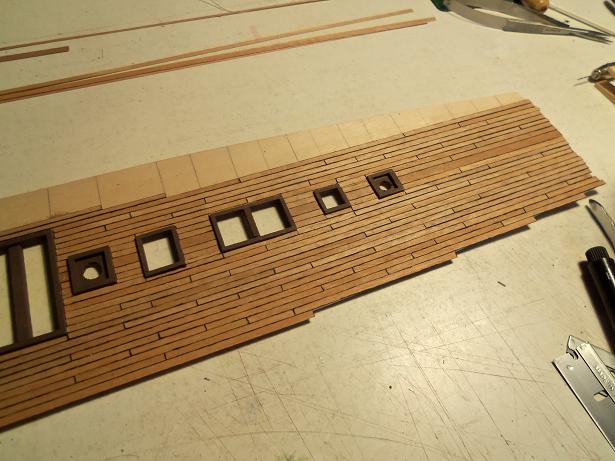
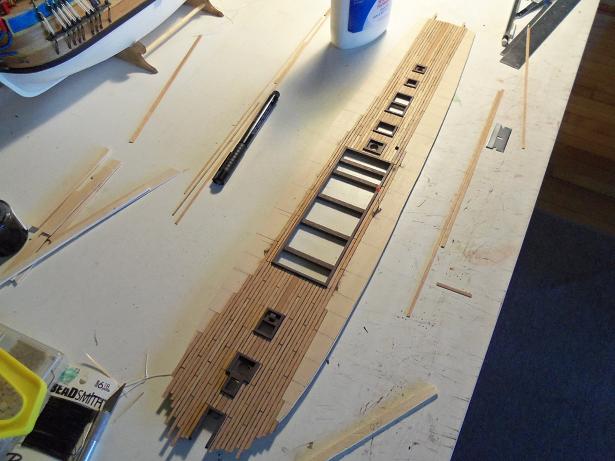
The planking continued until most of the fore deck was filled out. It systematically needs to flow aft, so that the girth on both sides can be completed.
It can flow into the mid ship…….but the aft section will need to be filled in. I began to fill in the center of the aft section.

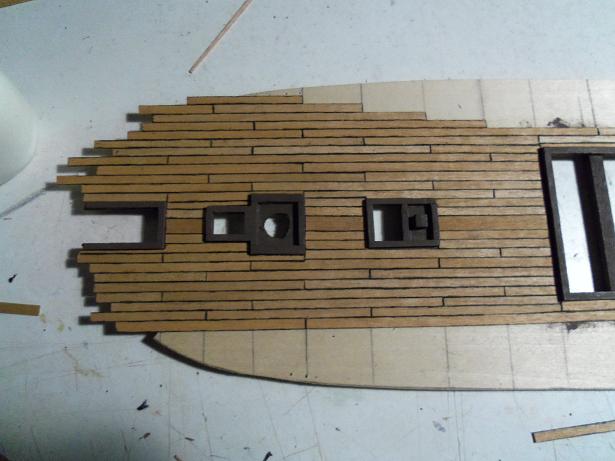
The king plank was run to the stern. It’s slightly darker that the 3 mm planking, so it’s going to stand out quite nicely.

I’m trying my best to stagger every three plank rows……but there are a few times where that wasn’t possible. Along the mid ship opening, I ended up going every other row…….this will allow the staggerings to be evenly present along the entire deck. I finally boxed in all of the aft holds.


I wasn’t until I finished doing this, when I realized what I was forgetting… the poop deck! If I had thought of this earlier, I could have subbed in the aft section that this deck will cover, with the 5 mm planking {I have an ample supply of this size planking}. Well, I guess I had better get busy with the platform for it……..I’ll still need to cut it out. I cemented two pieces together, in preparation to trace it.

I will need to plank this deck as well…….more of a strain on the supply of 3 mm planking……that is beginning to dwindle. I will need to order more of it to do the gun deck………I’ve had negative comments about what I intend to do. I don’t blame them……but I’m not in position at the moment to order any, and I want to get these deck planked before they do other weird things to me! I have already seen what changing the direction of the wood grain has…….the spar deck didn’t curl like the gun deck did…..there was a lesson to learn here. I did a bit more planking…..then called it quits for the evening
AHOY!!!
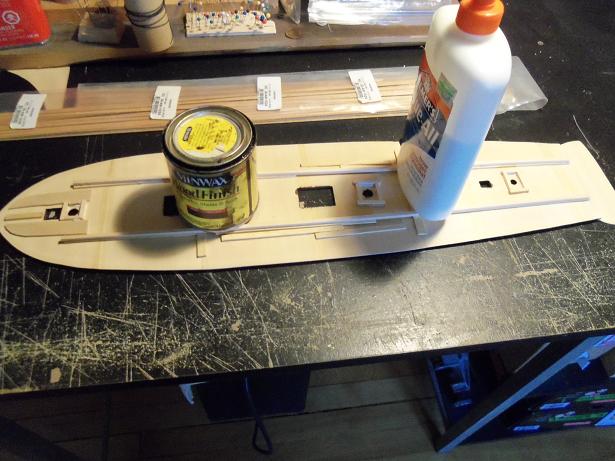
I thought you might get a kick out of the deck dry fit. Some prep was needed before the planking could begin. The grate and staircase moldings needed to be painted on both decks. The spar deck needed a bit more added to it, so I painted the gun deck first.

The spar deck needed to have beams installed in the large opening, in the center of the deck. With how thick they needed to be, 1/2 of the thickness was run across the opening, and the other half was run under the deck platform. This will give the look of the deck support.


The mast pots were cemented under the gun deck……I decided to go with them being 3/16 deep. These will be capped off, so the mast will sit without too much added depth.
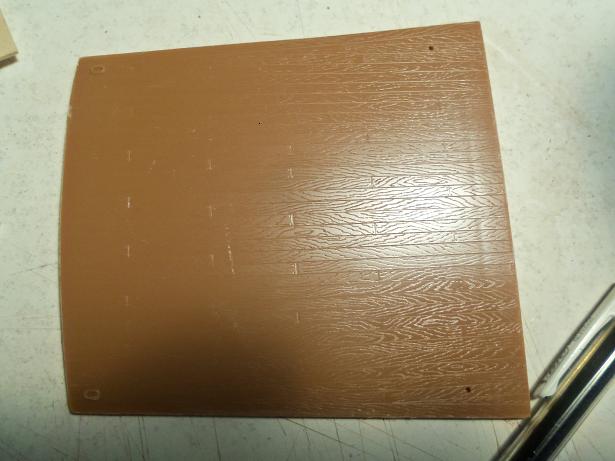
This deck was painted at this time. I used a flat paint……French Chestnut brown.

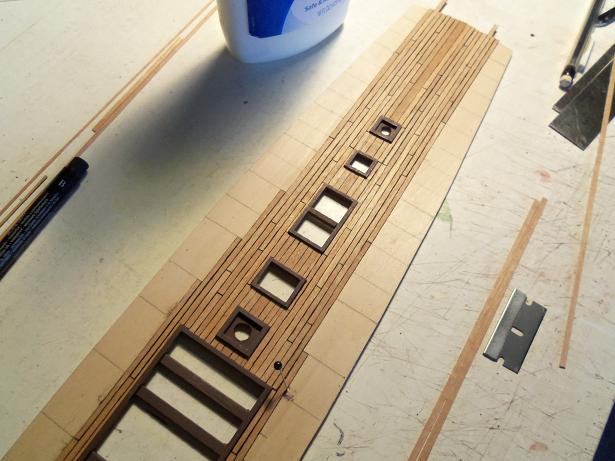
I began to plank the deck. I found, by looking at the plastic decks, that the planks were in a variety of different lengths. The butt stagger was per every three plank rows. I didn’t get too far…….but it will give a good idea of how it will look. Another thing I noticed, was that the thickness of the moldings were different than the plastic deck moldings. In some places I used thicker strip stock……for this reason, it might have been better if I used thinner planking strips. I’m using 3 mm……perhaps I should be doing it with 2 mm instead. I should also take into consideration, that I added in the 5 mm king plank, something I noticed as an afterthought. In truth, it just means that I will need to fit the planking in, in some areas.


I hope to get more done this week.
AHOY!!!
